Getting Started using the TIA API interface
The following guide provides a step-by-step walkthrough on how to register and obtain an API key, which is required to use the API.
You will need to follow the steps in each of the following sections which concludes in retrieving your API key.
Please note we have a DEVELOPER site and a LIVE site
Developer Site - https://developer.tiasurvey.com
The developer site is the site where the programmers and developer can build and test applications, keys, and functionality. This site is to allow developers an opportunity to build their connections to the API without disturbing any live operations. Data submitted here is NOT MONITORED and is NOT INCLUDED in any report.
Live Site - https://tiasurvey.com
A developer API key WILL NOT work on the live website.
Once developers have built and tested their applications they will need to register on the live site and generate an API Key there. Then in the application, the URL and API Key will need to be updated.
Quick Start Guide
- Registration - get your account setup if you have not already
- My Account - where to go to get your account finalized and get an API key
- Register/Renew an API Key - the process of getting an API key
- Using GET survey_fields - how to get the field map from the TIA system
- Matching fields in your program - line up your data with the TIA fields
- Building a data object - what type of data the interface looks to receive from your program
- Submitting the data object - sending your data to TIA via the RESTful interface
- Closing a survey - ending your session so your data is included in the report
Registration 
Because this is a protected site, you must register before obtaining a key.
-
Register on the TIA site
- Click on the "Want to Register?" link in the menu.
- On the registration page, fill out the form with your information. Required fields will be highlighted if not completed.
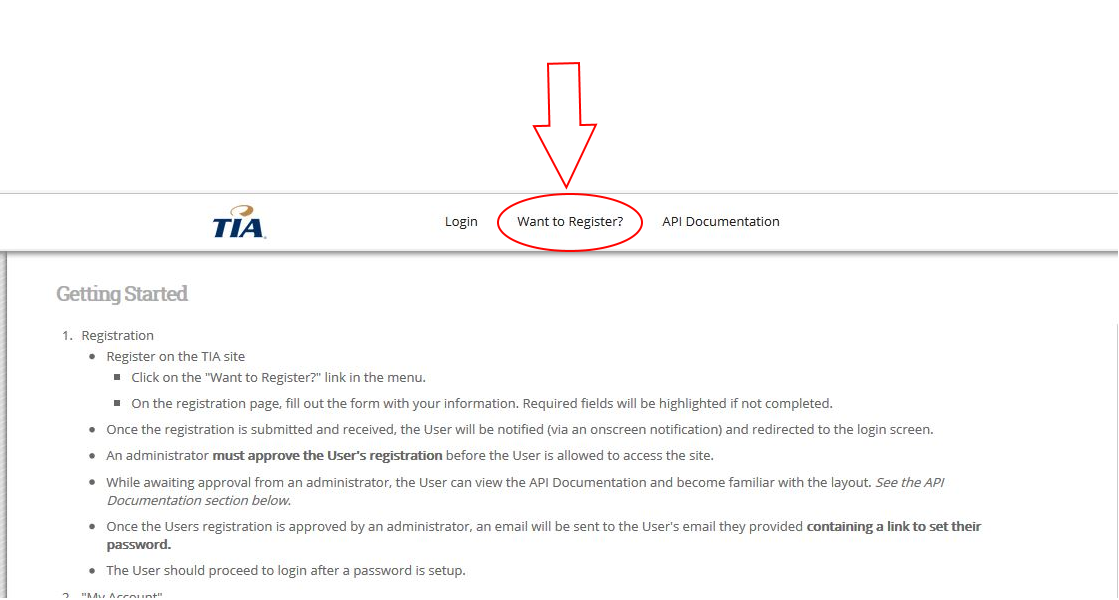
Registration Link.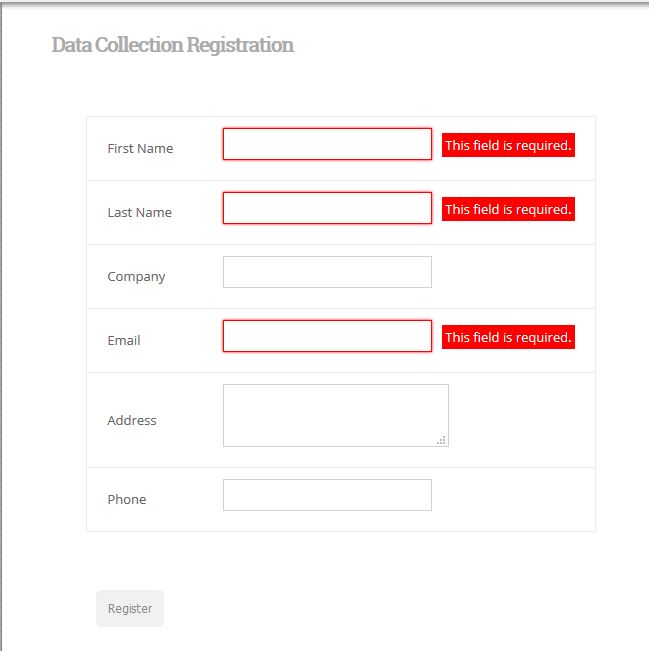
Registration form. - Once the registration is submitted and received, the User will be notified (via an onscreen notification) and redirected to the login screen.
- An administrator must approve the User's registration before the User is allowed to access the site.
- While awaiting approval from an administrator, the User can view the API Documentation and become familiar with the layout. See the API Documentation.
- Once the Users registration is approved by an administrator, an email will be sent to the User's email they provided which contains a link to set their password.
- Clicking the link in the email will take you to the screen above. The User should proceed to login after a password is setup.
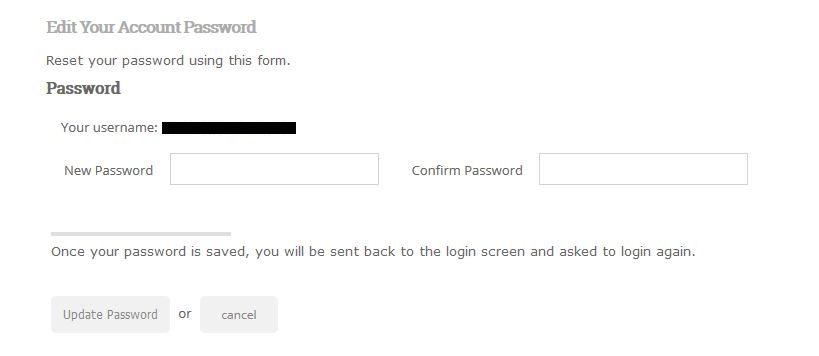
Email Links to this page.
My Account 
- Upon logging in, the User will be directed to their home page.
- The home page contains a list of surveys the User can access. If no surveys are listed then access to surveys has not been granted by an administrator. Contact your administrator for more information.
- The surveys contain a description of said survey as well as details about the latest (at most 3) submission to the survey.

Dashboard screen shown after login. -
The "My Account" page, accessible by clicking "My Account" button in the menu bar, contains information about your account.
- The account information section on the right contains detailed information about the users account including:

Example account API management screen, after login.- Last logged in
- Last IP Address
- Role/Access – states the role of the User for the site
- Survey Access – a list of surveys the User has access to, this list matches the users home page list of surveys.
- NOTE: If both the home page and the Survey Access contain a message like - “No surveys are accessible”, then the User should contact an administrator to gain access to the necessary surveys.
- API Key – the Users current API Key. If this field is empty then an API Key has not been generated.
- Key Status - Displays in days how long the Users API Key has left until expiration. This field will be empty if an initial API Key has not been generated.
- Under the account information will be links where the User can:
- Change their password
- Register/Renew an API key – See Register/Renew an API Key section.
- View the tracking logs for the Users API usage.
- The account information section on the right contains detailed information about the users account including:
Register/Renew an API Key 
- To register an API Key for the first time or to renew an API Key that is about to expire, go to My Account and click the "Register/Renew Your API Key" link.
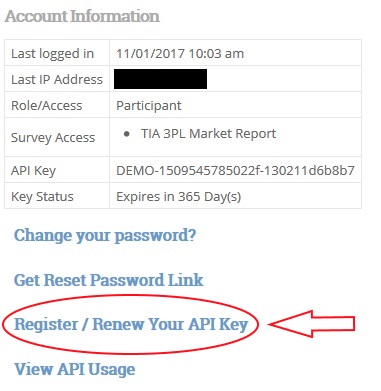
Example account API management screen, after login. - If no API keys have been generated previously a message will display with instructions on how to generate an API Key.
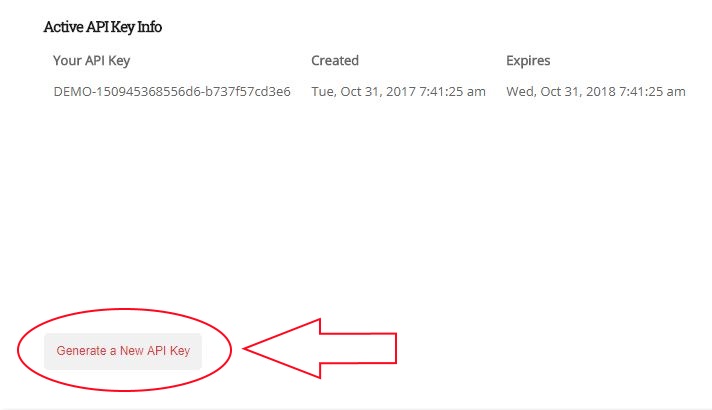
Example API key generation.- Once an API Key is generated an "Active API Key Info" section will appear with the API Key and details of when the Key was created and when it will expire.
- If the User already has an API Key and wishes to Renew a Key that is about to expire, simply click the "Generate a New API Key" button and the information in the active section will update.
- Any previous and expired keys will be noted in the "Previous API Keys" section.
- Once a valid API Key is generated, the User is ready to begin accessing the surveys via the API.
- NOTE: All third party API programs that use the API Key will need to be updated with the new key every time a new key is generated.
Working With The API 
Now that you have registered on the site and generated an API Key, you are ready to begin.
The API is a way for your program to communicate with and send data to the TIA Survey Collection System.
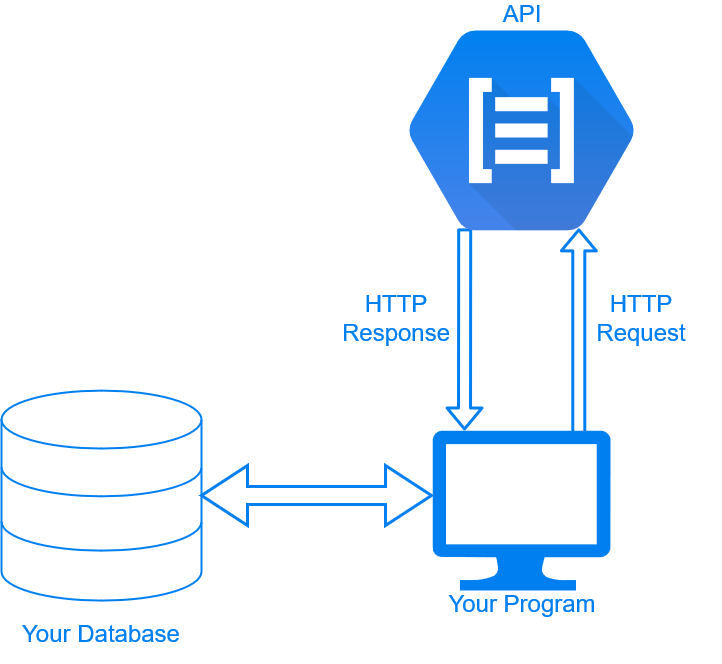
The Process Of Communicating With the API

- The first thing you will need to do, is collect the data from your system to submit to the API
-
Next you will need a list of fields that you can submit to. The API offers a GET functions that allows you to retrieve all of the survey fields with a name, description, code, and whether or not this field is required.
Example:{ "status" : "Returned list of survey fields.", "data" : [ { "name" : "Fieldname1", "code" : "Fieldcode1", "type" : "Date", "description" : "A description of this field", "required" : "Y" }, { "name" : "Fieldname2", "code" : "Fieldcode2", "type" : "Integer", "description" : "A description of this field", "required" : "Y" }, { "name" : "Fieldname3", "code" : "Fieldcode3", "type" : "Decimal", "description" : "Description3", "required" : "N" }, { "name" : "Fieldname4", "code" : "Fieldcode4", "type" : "Text", "description" : "Description4", "required" : "N" } ] }Example: https://developer.tiasurvey.com/get/survey_fields/YOUR_API_KEY_HERE/30
See the /get/survey_fields/(API_KEY)/(surveyID) documentation for more information.
-
Now that you have the data that you need to submit and the survey fields list, you are ready to build a data object to send to the API. To build the data object you will need to match your data to the API Survey Fields. From the survey fields list you will need to use the "code" as the field you are submitting to and your data will go in the "input" attribute.
NOTE: The survey fields list returned from https://developer.tiasurvey.com/get/survey_fields/YOUR_API_KEY_HERE/30 contains a "required" attribute. If this attribute value is "Y" then this survey field is required by the survey and MUST HAVE a value submitted to it. See the /post/close_survey/(API_KEY)/(surveyID) documentation for more information.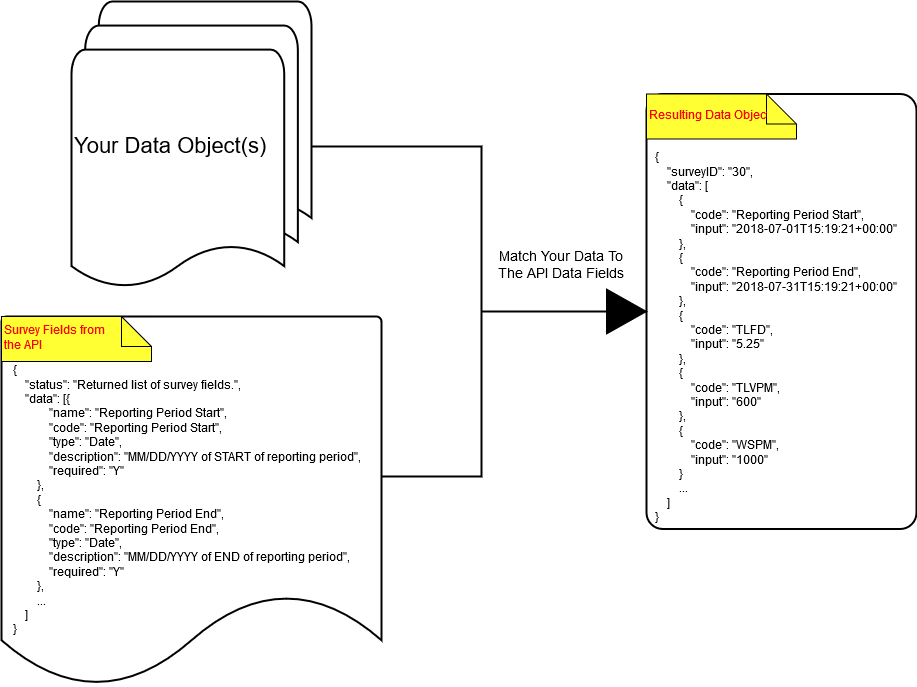
The data object type that the API accepts is a JSON string. Once you have mapped your data to the survey fields you will need to build a JSON object to send to the API using the survey field code. If you are unsure about the format of your data object then you can find a JSON validator online with a simple Google search.
Example:{ "surveyID" : "30", "data" : [ { "code" : "Reporting Period Start", "input" : "2018-07-01T15:19:21+00:00" }, { "code" : "Reporting Period End", "input" : "2018-07-31T15:19:21+00:00" }, { "code" : "TLVS", "input" : "15" }, { "code" : "TLVD", "input" : "10000" }, { "code" : "TLFD", "input" : "15" }, { "code" : "TLVPM", "input" : "600" }, { "code" : "WSPM", "input" : "1000" } ... ] }NOTE: If you do not have data for a field then you can just OMIT that field. -
Now you are ready to submit. Using your program and your API Key you can make a POST request to the /post/submit/(API_KEY) function. Be sure to include the JSON data object that you have made in the body. You can submit data as often as you like to a survey submission and new data will automatically OVERWRITE old fields. Surveys should be closed when all data has been submitted. During a reporting period you may submit to a survey as many times as you would like.
NOTE: If there are any errors in your submission (e.g. Format Errors, Invalid Code Errors, etc.) then a JSON object with a detailed list of the errors will be returned to you.See the /post/submit/(API_KEY) documentation for more information.
-
Once you are finished submitting to a survey you will NEED to close the survey using the /post/close_survey/(API_KEY)/(surveyID). Given a survey ID, this will close the last/latest open progress. For example when the user has filled in all of the information and is ready to complete and finalize that survey submission. Note, you cannot submit additional data for a survey that has been closed.
NOTE: Some data maybe required for a given survey. If data is not submitted to required fields then a response containing all of the required fields will be returned and the survey will not be closed. You will have to submit to all required fields before being able to close a survey.See the /post/close_survey/(API_KEY)/(surveyID) documentation for more information.

